我的Bilibili频道:香芋派Taro
我的个人博客:taropie0224.github.io
我的公众号:香芋派的烘焙坊
我的音频技术交流群:1136403177
我的个人微信:JazzyTaroPie
本文将以一个立体声扩展效果器为例,完整的跑通从Wwise效果器插件开发到Unity实现样例的过程。
安装SDK
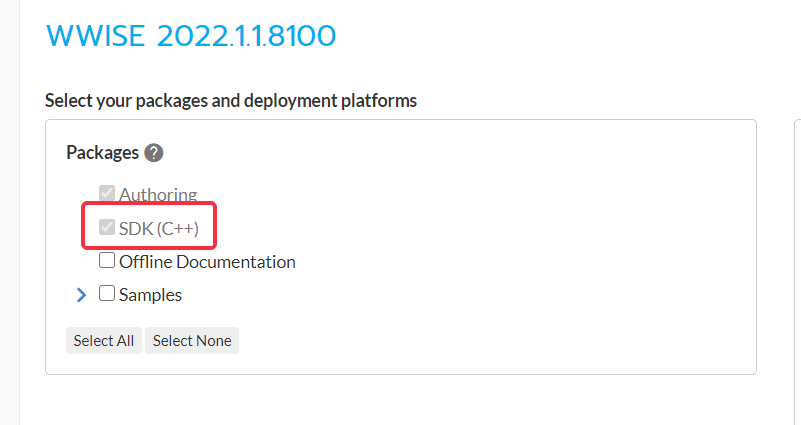
在Wwise Lancher中安装Wwise时,会有是否同时安装SDK的可选项:
构建工程
在你Wwise的安装目录,比如我这里是这个位置:
1
| E:\Program Files (x86)\Audiokinetic\Wwise 2022.1.1.8100\Scripts\Build\Plugins
|
可以找到Wwise Plugins的构建工具
打开控制台cd到你准备放置插件的位置,并输入以下命令(其中引号中的路径为上方提到的位置):
1
| python "%WWISEROOT%/Scripts/Build/Plugins/wp.py" new
|
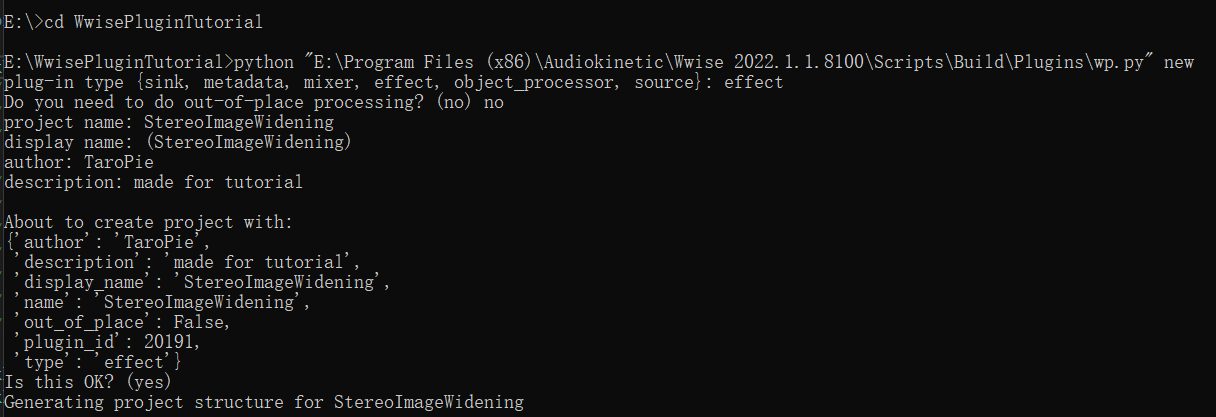
此时会让你选择工程的类型,可以参考以下选择,这里我们以构建一个立体声扩展插件为例:
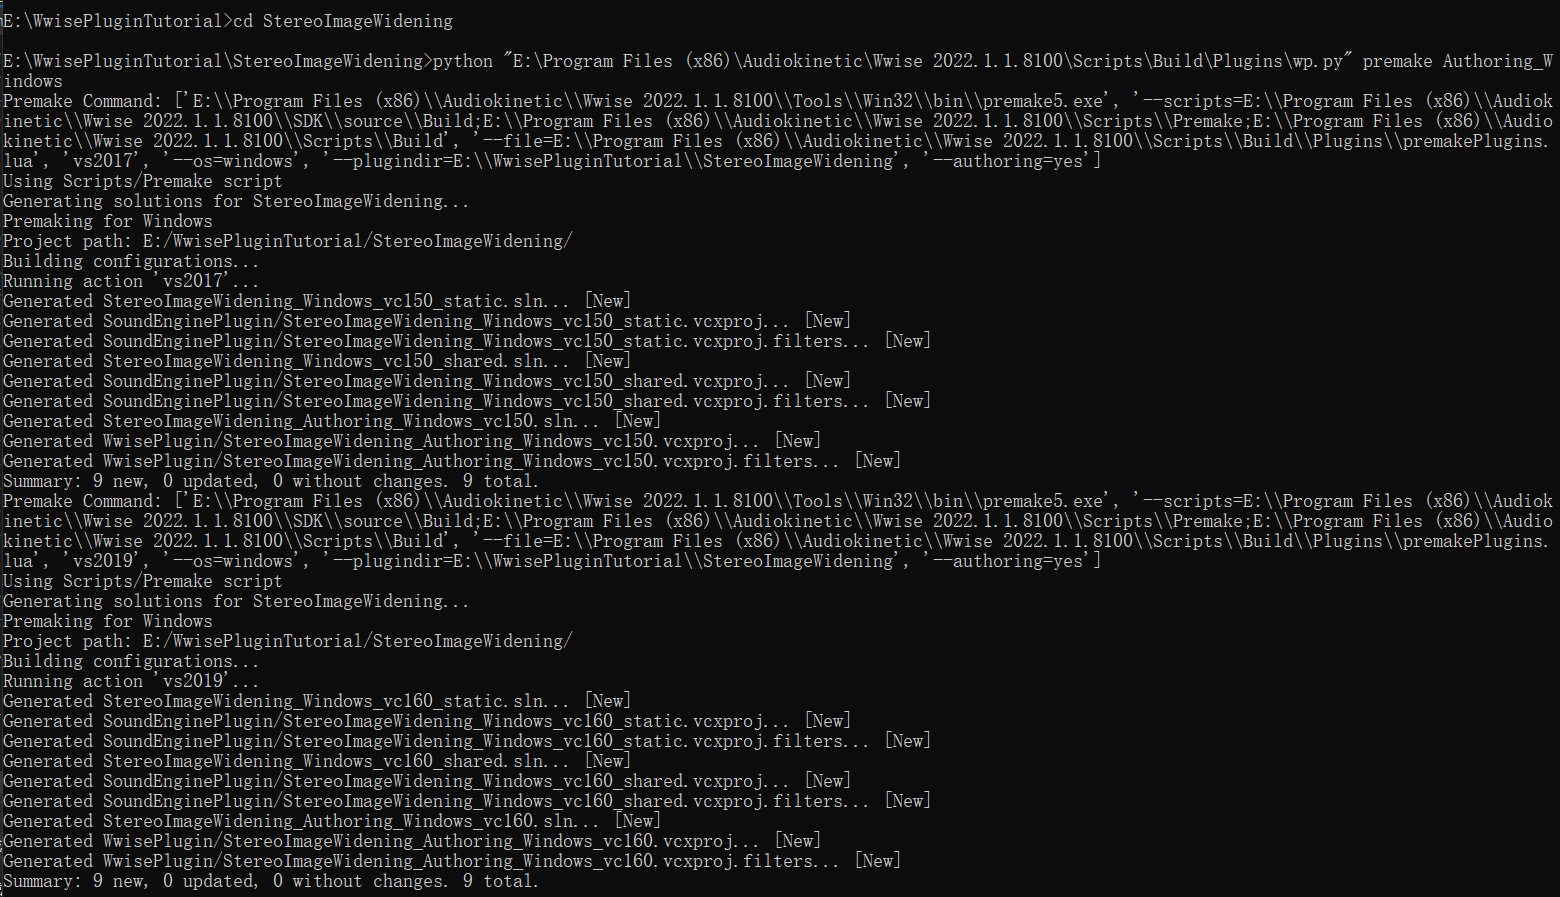
使用Premake命令生成目标平台(这里生成VC160):
1
| python "%WWISEROOT%/Scripts/Build/Plugins/wp.py" premake Authoring_Windows
|
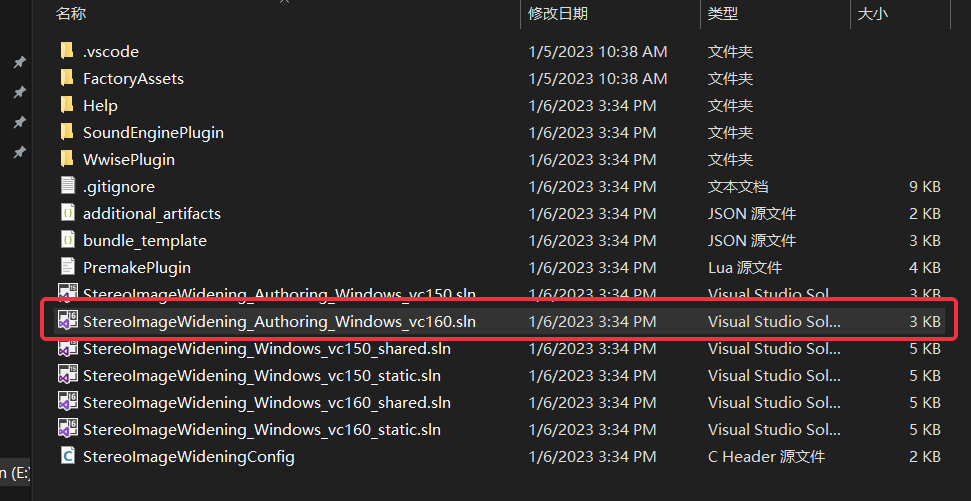
打开刚刚构建的项目:
此时直接编译运行(记得选择x64,release),你可以在该路径下找到编译结果,如果没有找到,请检查项目的输出目录:
1
| %WWISEROOT%\Authoring\x64\Release\bin\Plugins
|

测试Wwise能否读取该插件
打开Wwise工程,检查能否正常读取该插件
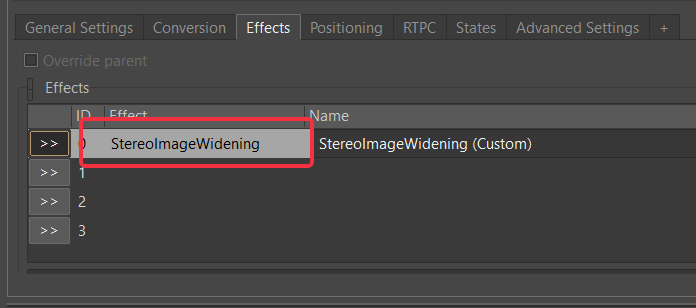
编写插件
Wwise插件主要分为声音引擎(StereoImageWideningFX)和设计工具(StereoImageWidening)两部分
在这里我们将以一个立体声扩展为例,完整的跑通从构建工程到游戏中使用的过程,具体DSP原理在这里不多赘述,可以参考:https://taropie0224.github.io/2022/12/12/如何拓宽或缩窄你的声场——立体声扩展(Stereo%20Image%20Widening)/
我们首先对设计工具部分进行修改,你可以在其中很多地方找到PlaceHolder的占位内容,替换即可
在xml文件中添加参数的定义,可以定义参数的名称,步进,最小最大值等,注意每个参数都需要有唯一的ID,这里分别是0和1
1
2
3
4
5
6
7
8
9
10
11
12
13
14
15
16
17
18
19
20
21
22
23
24
25
26
27
28
29
|
···
<Property Name="Width" Type="Real32" SupportRTPCType="Exclusive" DisplayName="Width">
<UserInterface Step="0.1" Fine="0.001" Decimals="3" UIMax="10" />
<DefaultValue>1</DefaultValue>
<AudioEnginePropertyID>0</AudioEnginePropertyID>
<Restrictions>
<ValueRestriction>
<Range Type="Real32">
<Min>0</Min>
<Max>2</Max>
</Range>
</ValueRestriction>
</Restrictions>
</Property>
<Property Name="Gain" Type="Real32" SupportRTPCType="Exclusive" DisplayName="Gain">
<UserInterface Step="0.1" Fine="0.001" Decimals="3" UIMax="10" />
<DefaultValue>1</DefaultValue>
<AudioEnginePropertyID>1</AudioEnginePropertyID>
<Restrictions>
<ValueRestriction>
<Range Type="Real32">
<Min>0</Min>
<Max>2</Max>
</Range>
</ValueRestriction>
</Restrictions>
</Property>
···
|
在声音引擎部分,StereoImageWideningFXParams.h中,更新参数ID和参数名称
1
2
3
4
5
6
7
8
9
10
11
12
13
|
···
static const AkPluginParamID PARAM_WIDTH_ID = 0;
static const AkPluginParamID PARAM_GAIN_ID = 1;
static const AkUInt32 NUM_PARAMS = 2;
struct StereoImageWideningRTPCParams
{
AkReal32 fWidth;
AkReal32 fGain;
};
···
|
同时更新StereoImageWideningFXParams.cpp
1
2
3
4
5
6
7
8
9
10
11
12
13
14
15
16
17
18
19
20
21
22
23
24
25
26
27
28
29
30
31
32
33
34
35
36
37
38
39
40
41
42
43
44
45
46
47
48
49
50
51
52
53
54
55
56
57
58
|
···
AKRESULT StereoImageWideningFXParams::Init(AK::IAkPluginMemAlloc* in_pAllocator, const void* in_pParamsBlock, AkUInt32 in_ulBlockSize)
{
if (in_ulBlockSize == 0)
{
RTPC.fWidth = 1.0f;
RTPC.fGain = 1.0f;
m_paramChangeHandler.SetAllParamChanges();
return AK_Success;
}
return SetParamsBlock(in_pParamsBlock, in_ulBlockSize);
}
AKRESULT StereoImageWideningFXParams::Term(AK::IAkPluginMemAlloc* in_pAllocator)
{
AK_PLUGIN_DELETE(in_pAllocator, this);
return AK_Success;
}
AKRESULT StereoImageWideningFXParams::SetParamsBlock(const void* in_pParamsBlock, AkUInt32 in_ulBlockSize)
{
AKRESULT eResult = AK_Success;
AkUInt8* pParamsBlock = (AkUInt8*)in_pParamsBlock;
RTPC.fWidth = READBANKDATA(AkReal32, pParamsBlock, in_ulBlockSize);
RTPC.fGain = READBANKDATA(AkReal32, pParamsBlock, in_ulBlockSize);
CHECKBANKDATASIZE(in_ulBlockSize, eResult);
m_paramChangeHandler.SetAllParamChanges();
return eResult;
}
AKRESULT StereoImageWideningFXParams::SetParam(AkPluginParamID in_paramID, const void* in_pValue, AkUInt32 in_ulParamSize)
{
AKRESULT eResult = AK_Success;
switch (in_paramID)
{
case PARAM_WIDTH_ID:
RTPC.fWidth = *((AkReal32*)in_pValue);
m_paramChangeHandler.SetParamChange(PARAM_WIDTH_ID);
break;
case PARAM_GAIN_ID:
RTPC.fGain = *((AkReal32*)in_pValue);
m_paramChangeHandler.SetParamChange(PARAM_GAIN_ID);
break;
default:
eResult = AK_InvalidParameter;
break;
}
return eResult;
}
|
回到设计工具部分,在StereoImageWideningPlugin.cpp中,更新GetBankParameters函数,以将两个参数写入到SoundBank中
1
2
3
4
5
6
7
8
9
10
11
|
···
bool StereoImageWideningPlugin::GetBankParameters(const GUID & in_guidPlatform, AK::Wwise::Plugin::DataWriter& in_dataWriter) const
{
in_dataWriter.WriteReal32(m_propertySet.GetReal32(in_guidPlatform, "Width"));
in_dataWriter.WriteReal32(m_propertySet.GetReal32(in_guidPlatform, "Gain"));
return true;
}
···
|
再次来到声音引擎,此时我们已经完成了参数写入读取相关的全部过程,开始设计DSP部分
找到StereoImageWideningFX.cpp中的Execute函数,因为这里我们只针对立体声(双声道音频),所以将自带的遍历channel注释掉,直接对两个声道的数据进行处理
类似JUCE中processBlock的逻辑,对当前buffer中的每个sample(即pBuf[uFramesProcessed])进行处理
1
2
3
4
5
6
7
8
9
10
11
12
13
14
15
16
17
18
19
20
21
22
23
24
25
26
27
28
29
30
31
32
33
34
35
36
37
38
39
|
void StereoImageWideningFX::Execute(AkAudioBuffer* io_pBuffer)
{
const AkUInt32 uNumChannels = io_pBuffer->NumChannels();
AkUInt16 uFramesProcessed;
AkReal32* AK_RESTRICT pBufLeft = (AkReal32 * AK_RESTRICT)io_pBuffer->GetChannel(0);
AkReal32* AK_RESTRICT pBufRight = (AkReal32 * AK_RESTRICT)io_pBuffer->GetChannel(1);
uFramesProcessed = 0;
while (uFramesProcessed < io_pBuffer->uValidFrames)
{
auto sides = 0.5 * (pBufLeft[uFramesProcessed] - pBufRight[uFramesProcessed]);
auto mid = 0.5 * (pBufLeft[uFramesProcessed] + pBufRight[uFramesProcessed]);
sides = m_pParams->RTPC.fWidth * sides;
mid = (2.0 - m_pParams->RTPC.fWidth) * mid;
pBufLeft[uFramesProcessed] = (mid + sides) * m_pParams->RTPC.fGain;
pBufRight[uFramesProcessed] = (mid - sides) * m_pParams->RTPC.fGain;
++uFramesProcessed;
}
}
|
完成后编译运行即可
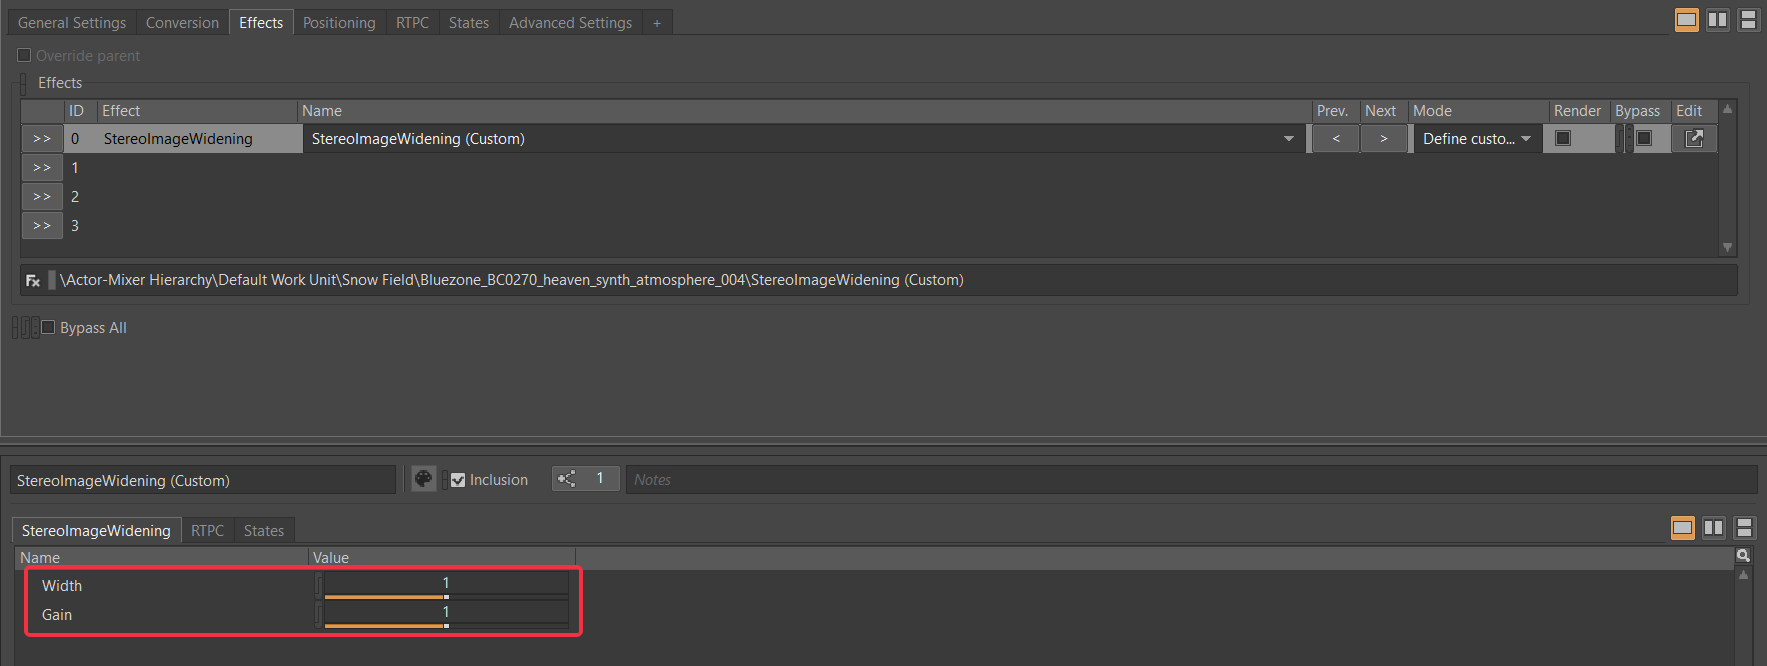
在Wwise中测试插件是否正常工作
打开Wwise工程并加载该插件,通过修改Width和Gain的值观察音频的变化是否符合预期
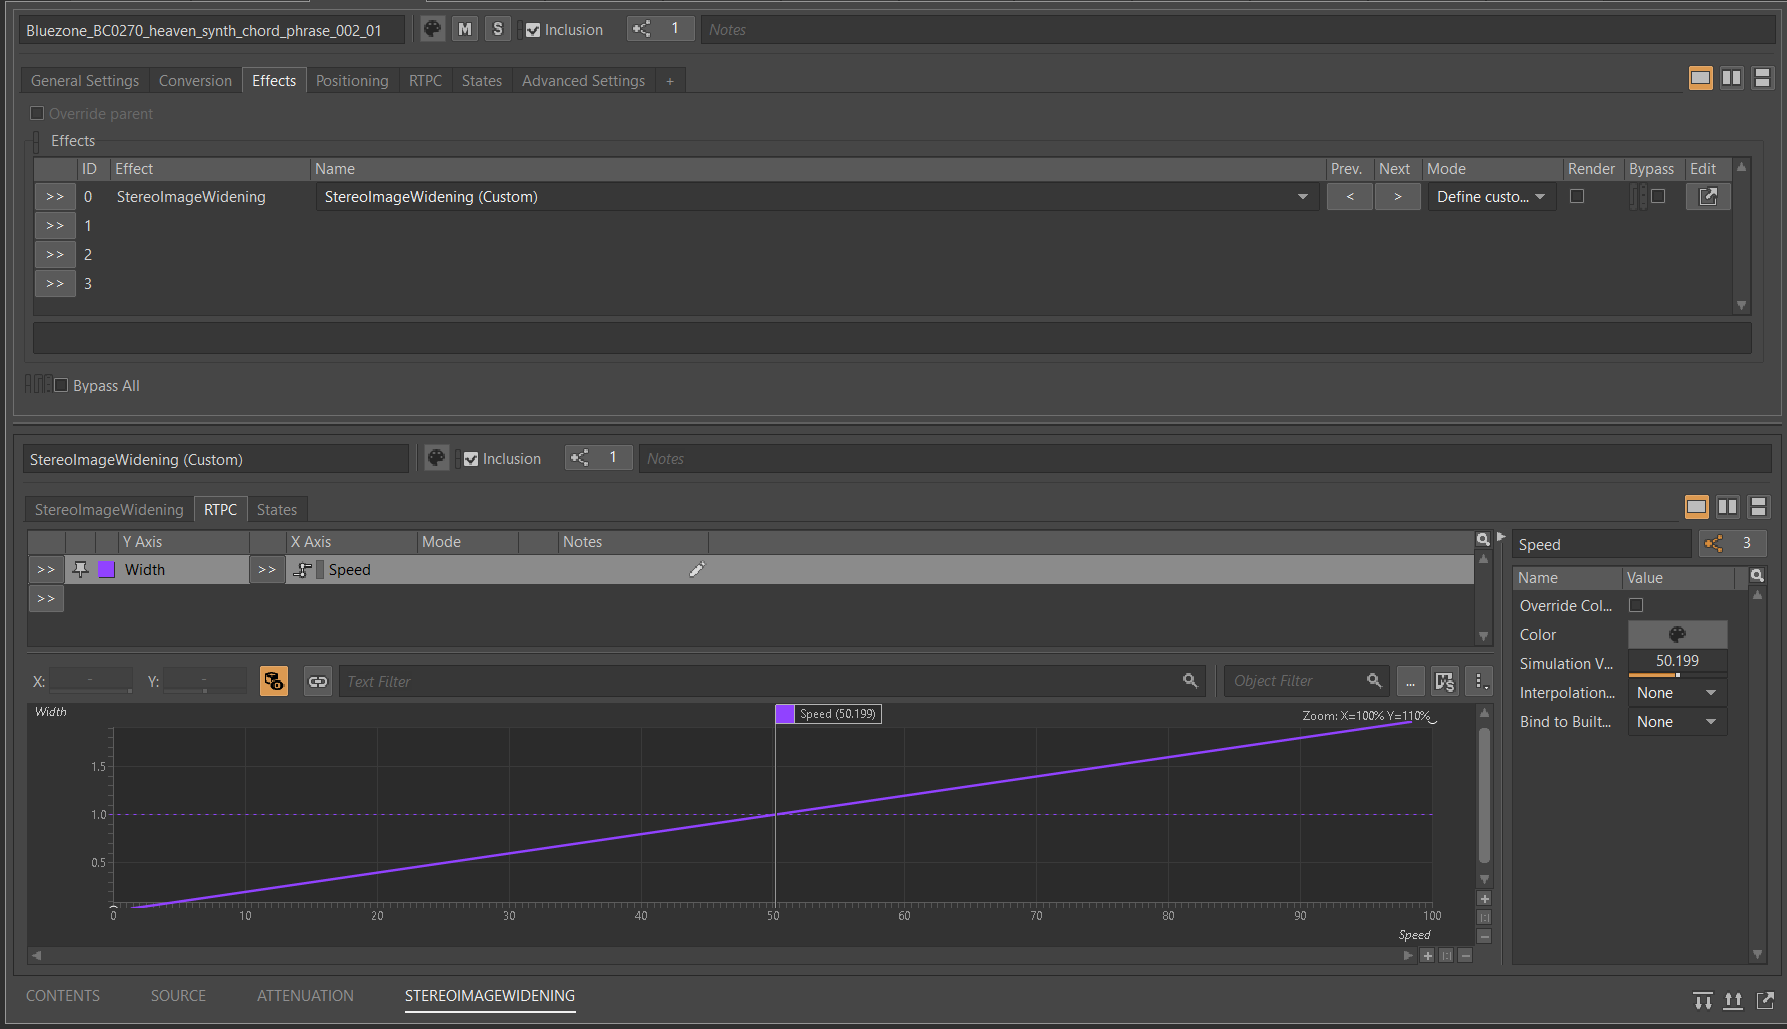
在Wwise中编写RTPC
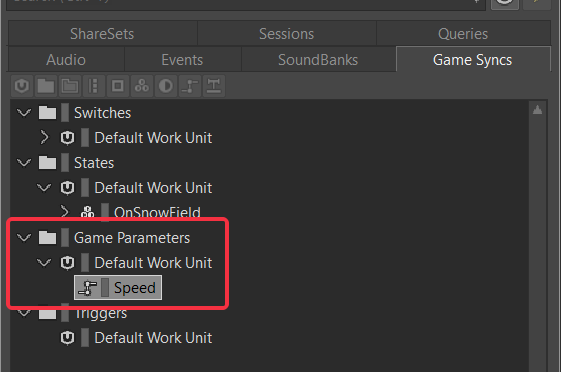
首先在Game Syncs中新建名为Speed的Game Parameter
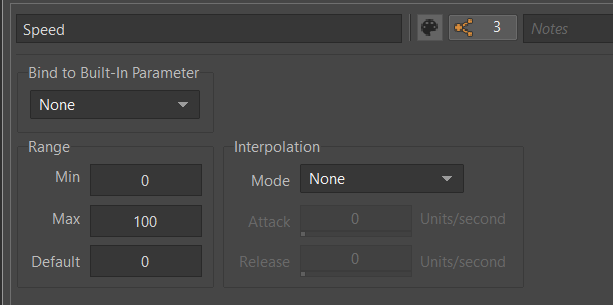
设定它的最小最大默认值分别为
打开刚刚挂载该插件的音频,为Width参考如下设置RTPC
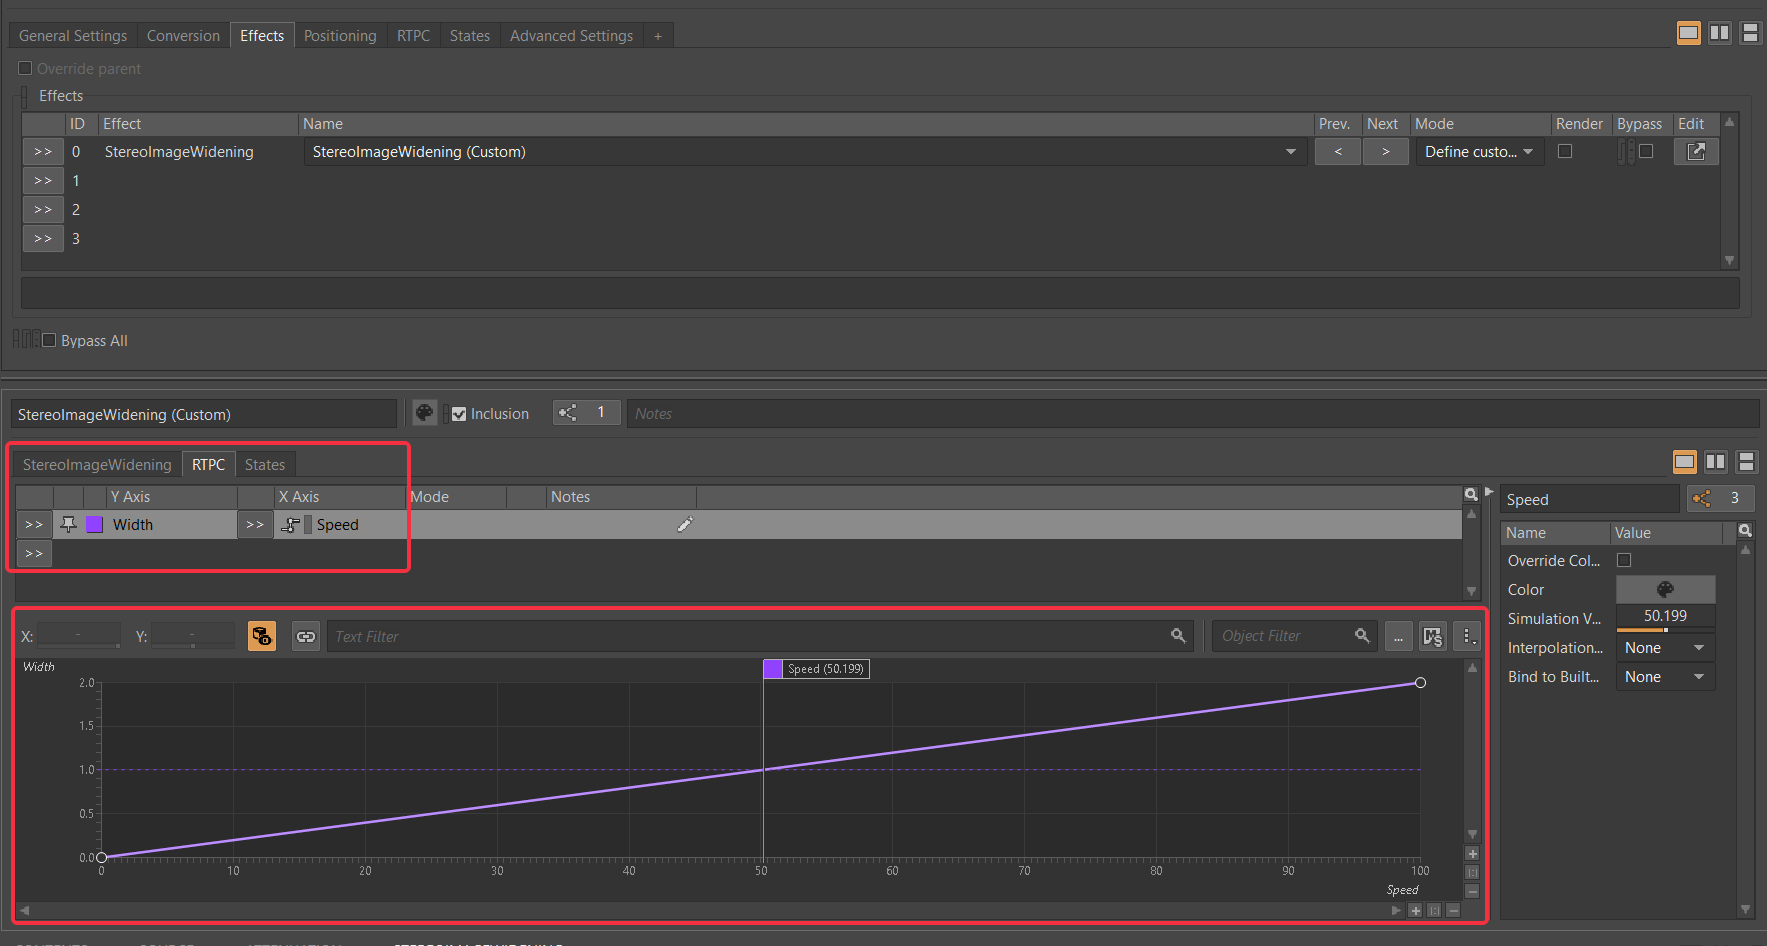
如果音频较短建议设置loop,再为该音频生成一个Play Event,最后在SoundBanks中进行Generate即可
同时将插件复制到对应的Unity工程
将刚刚编译生成的插件(.dll和.pdb)同时放置到对应Unity工程的下,路径为:
1
| Unity项目路径\Assets\Wwise\API\Runtime\Plugins\Windows\x86_64\DSP
|
在Unity中构建测试样例
这里以Unity提供的Starter Assets - First Person Character Controller为基本模版
下载链接:https://assetstore.unity.com/packages/essentials/starter-assets-first-person-character-controller-196525
在WwiseGlobal中添加AkAmbient,调用刚才生成的Play Event
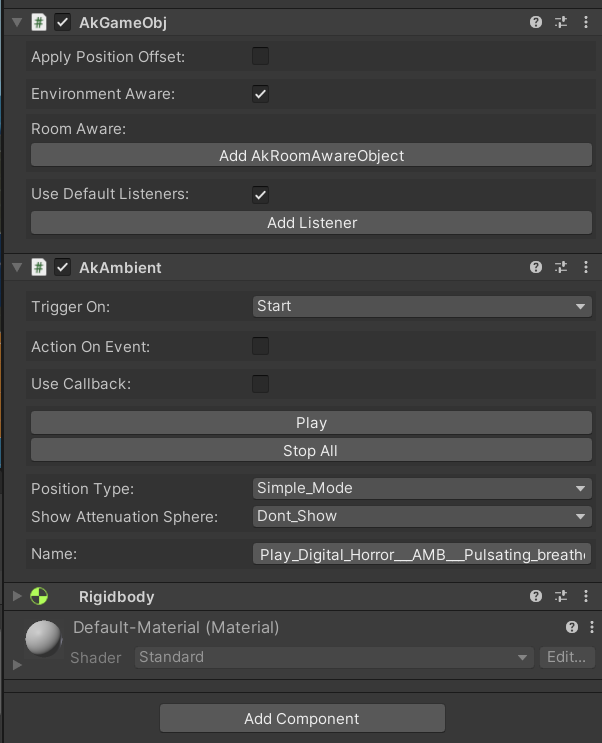
点击Hierachy中的PlayerCapsule,再点击First Person Controller中的Script脚本,会用VS打开该C#文件
添加RTPC参数mySpeed
1
2
3
4
| ···
[Header("Wwise Events")]
public AK.Wwise.RTPC mySpeed;
···
|
在Start()中进行初始化
1
2
3
4
5
6
7
8
9
10
11
12
13
14
15
16
17
18
| ···
private void Start()
{
_controller = GetComponent<CharacterController>();
_input = GetComponent<StarterAssetsInputs>();
#if ENABLE_INPUT_SYSTEM && STARTER_ASSETS_PACKAGES_CHECKED
_playerInput = GetComponent<PlayerInput>();
#else
Debug.LogError( "Starter Assets package is missing dependencies. Please use Tools/Starter Assets/Reinstall Dependencies to fix it");
#endif
_jumpTimeoutDelta = JumpTimeout;
_fallTimeoutDelta = FallTimeout;
mySpeed.SetGlobalValue(0);
}
···
|
在Move()中为其赋值
1
2
3
4
5
6
7
8
9
10
11
12
13
14
15
16
| ···
private void Move()
{
···
else
{
_speed = targetSpeed;
}
mySpeed.SetGlobalValue(25*_speed);
Vector3 inputDirection = new Vector3(_input.move.x, 0.0f, _input.move.y).normalized;
···
}
|
回到Wwise中,在My Speed中选择Speed

此时我们插件的Width已经与人物当前的速度进行绑定,在人物移动速度达到最快时,声场同样达到最大。
为了使这个变化过程更加容易感知,我们可以把默认值为10的Speed Change Rate改成2
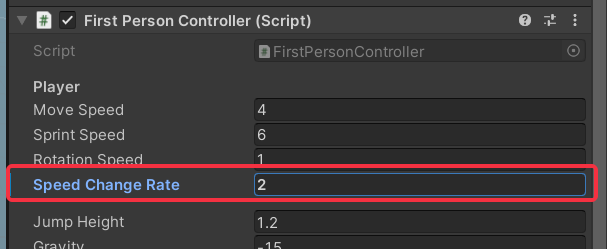
大功告成,此时进入游戏,在人物刚开始移动到移动到最大速度的过程中,你可以感知到音频的声场逐渐扩大


